How to setup a MailChimp Automation Campaign to Start or End with a Date Time.
[fullwidth background_color=”” background_image=”” background_parallax=”none” enable_mobile=”no” parallax_speed=”0.3″ background_repeat=”no-repeat” background_position=”left top” video_url=”” video_aspect_ratio=”16:9″ video_webm=”” video_mp4=”” video_ogv=”” video_preview_image=”” overlay_color=”” overlay_opacity=”0.5″ video_mute=”yes” video_loop=”yes” fade=”no” border_size=”0px” border_color=”” border_style=”” padding_top=”20″ padding_bottom=”20″ padding_left=”0″ padding_right=”0″ hundred_percent=”no” equal_height_columns=”no” hide_on_mobile=”no” menu_anchor=”” class=”” id=””][one_full last=”yes” spacing=”yes” center_content=”no” hide_on_mobile=”no” background_color=”” background_image=”” background_repeat=”no-repeat” background_position=”left top” border_position=”all” border_size=”0px” border_color=”” border_style=”” padding=”” margin_top=”” margin_bottom=”” animation_type=”” animation_direction=”” animation_speed=”0.1″ class=”” id=””][fusion_text]
Say you want an email campaign to either begin, or end on a specific date.
Sounds simple enough. Right?
This would be great when organising a series of introductory emails to go out to your subscribers before an event, for example.
Or, a series of thank-you, cross-sell, or up-sell emails to be sent out after an event.
The problem is that, although I think of it as being pretty basic functionality, this is not (*presently*) available or programmable in MailChimp!
Anyway, after spending hours and hours talking with customer support, about what I needed, I finally came up with a solution.
So without further ado, I present to you;
How you set up a MailChimp Automation Campaign using DATETIME.
Create a new list in MailChimp and select it. Select the Signup Forms, General forms, 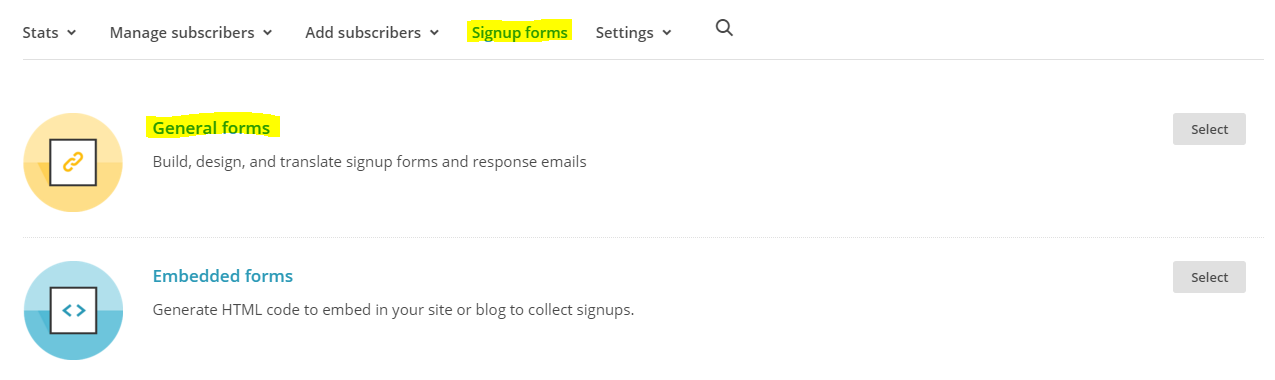
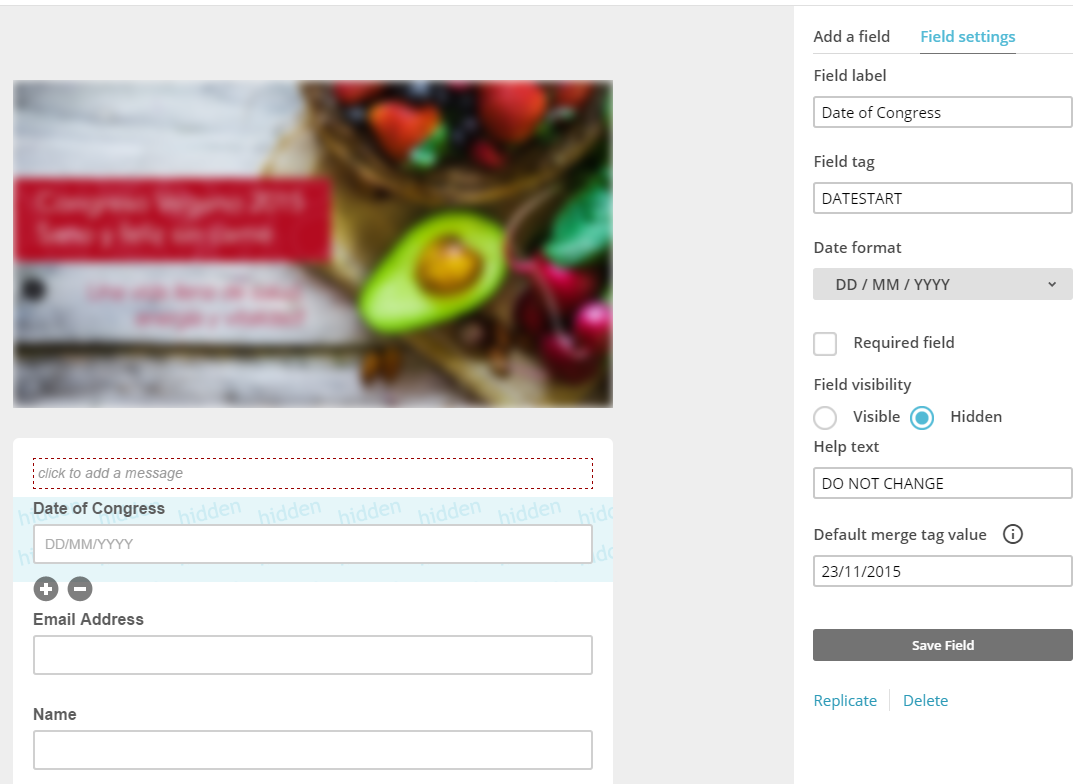
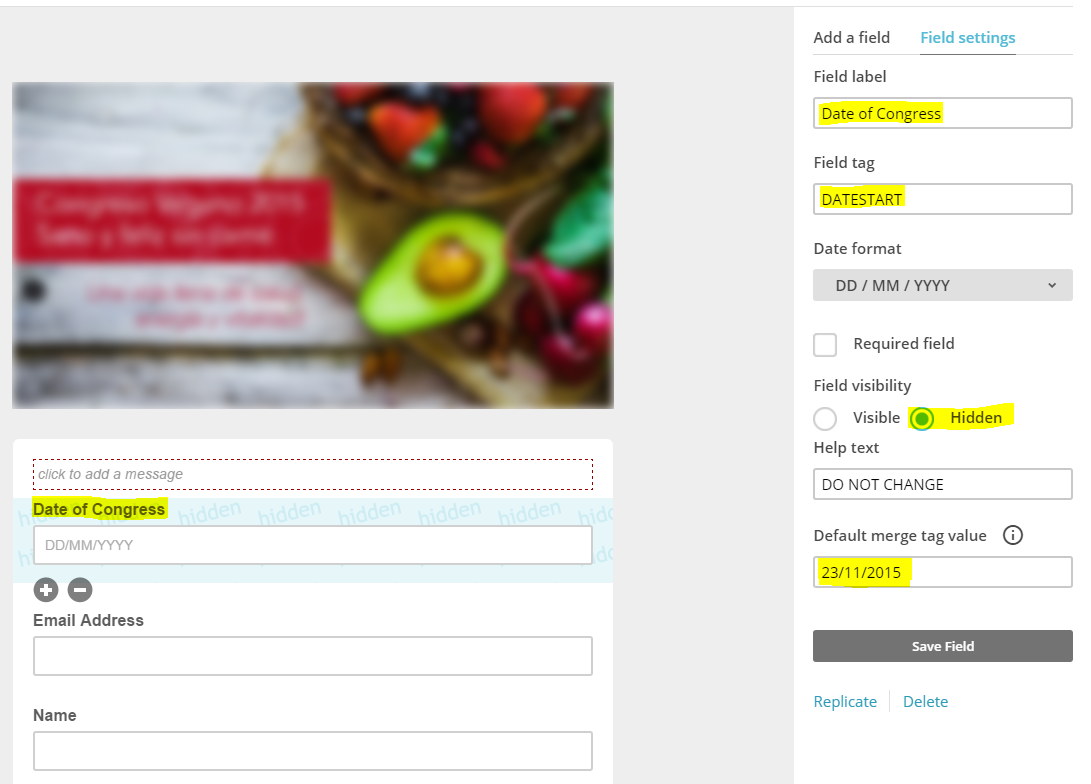
Add in a new Hidden DateTime field. Call it what you like, just make sure it is hidden. Set the default value to the date time field to be what every date you want to start or end your campaign on. Finally, click save.
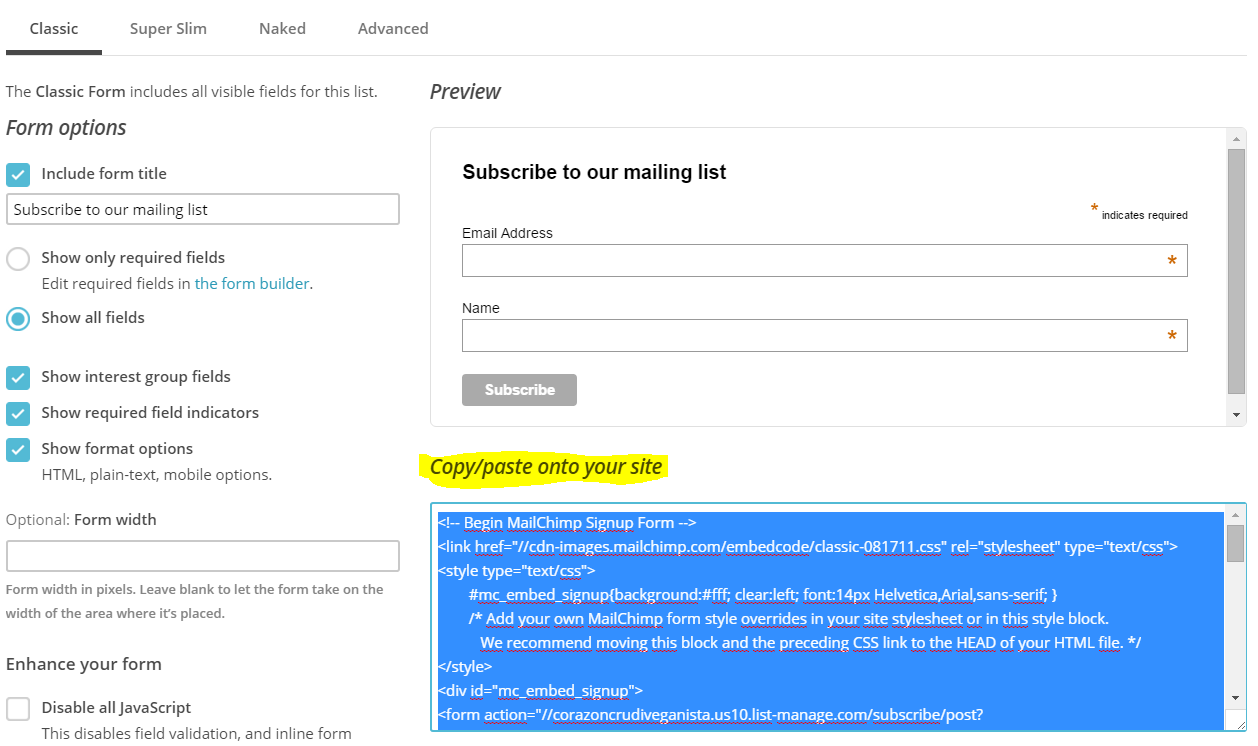
Next, go into the Embedded forms tab to get the code.
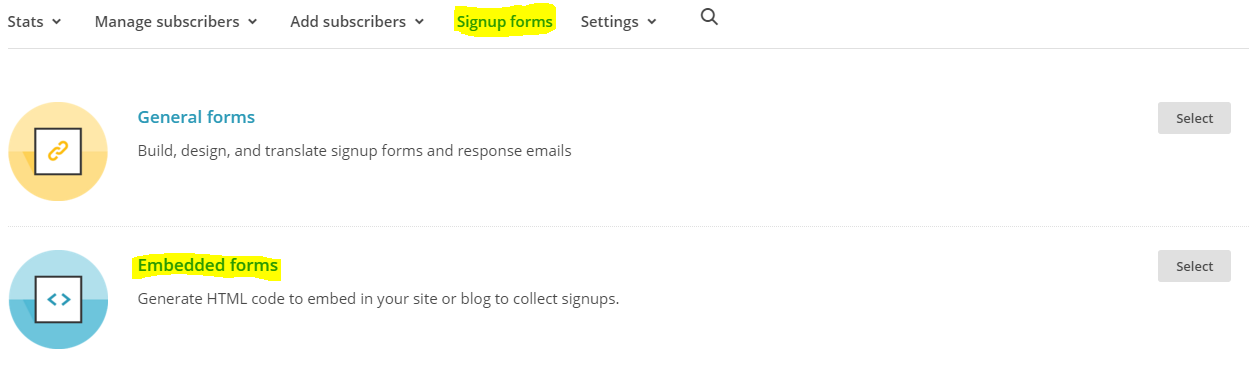
Copy the Embed Code from the Embedded Forms tab and paste it onto your website.
Remember, if you use an embedded form, you have to add in the DateTime field Yourself !!! This is important! Although we set the default value in the form above, it doesn’t actually add it in if its not in the form. So, add in the hidden field, and assign the value to be your date time again, like you did above. Also remeber, regardless of what format you specified above, the hidden field only works if you use the American Date format – e.g. MM/DD/YYYY. You can stick this code anywhere in between the <form>*put code here*</form> tags. For this example, the hidden field would look like this:
![]()
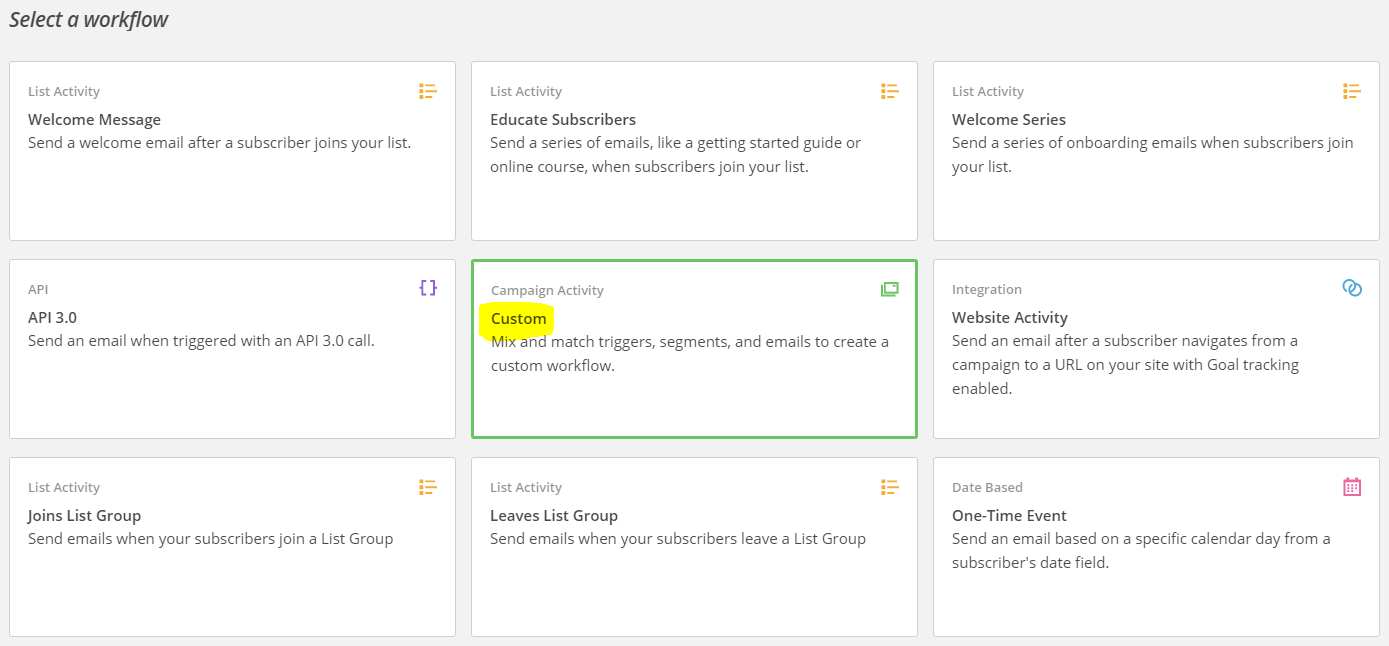
Now we move into the Automation section of MailChimp. So, create a new automation, select a list, and then select “Custom” as the workflow.
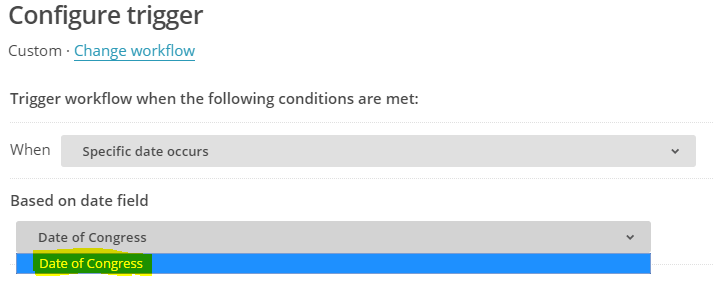
Click next a couple of times and set up the list defaults. then when you get to the Trigger section, select “Specific Date Occurs” from the drop down box.

You can now select the newly created DateTime field from the second drop down box.
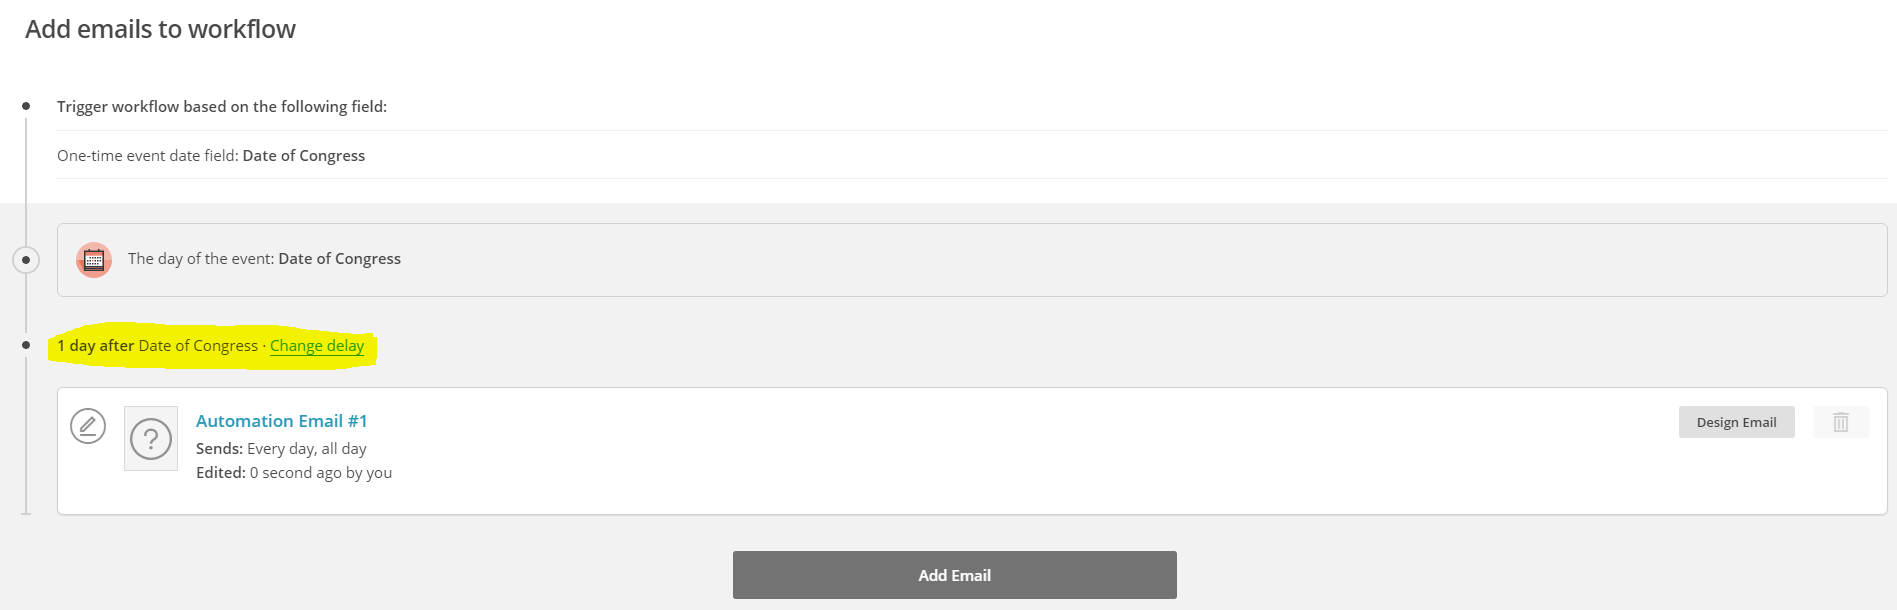
Click next a couple of times, and then add an email into the automation. you can see highlighted where to set up the delay. You can either set the emails to go out before, on the day of, or after the date you specify.
So there you have it.
Setting up an automated email campaign based upon a specifc date.
I hope this helped![/fusion_text][/one_full][/fullwidth]